36 Sea Kayak Expedition Top Tips you may not have heard before - learning takeaways from a sea kayaking adventure to Arctic Norway
Article by Dave Janes, a PYB instructor- written for Paddler Magazine
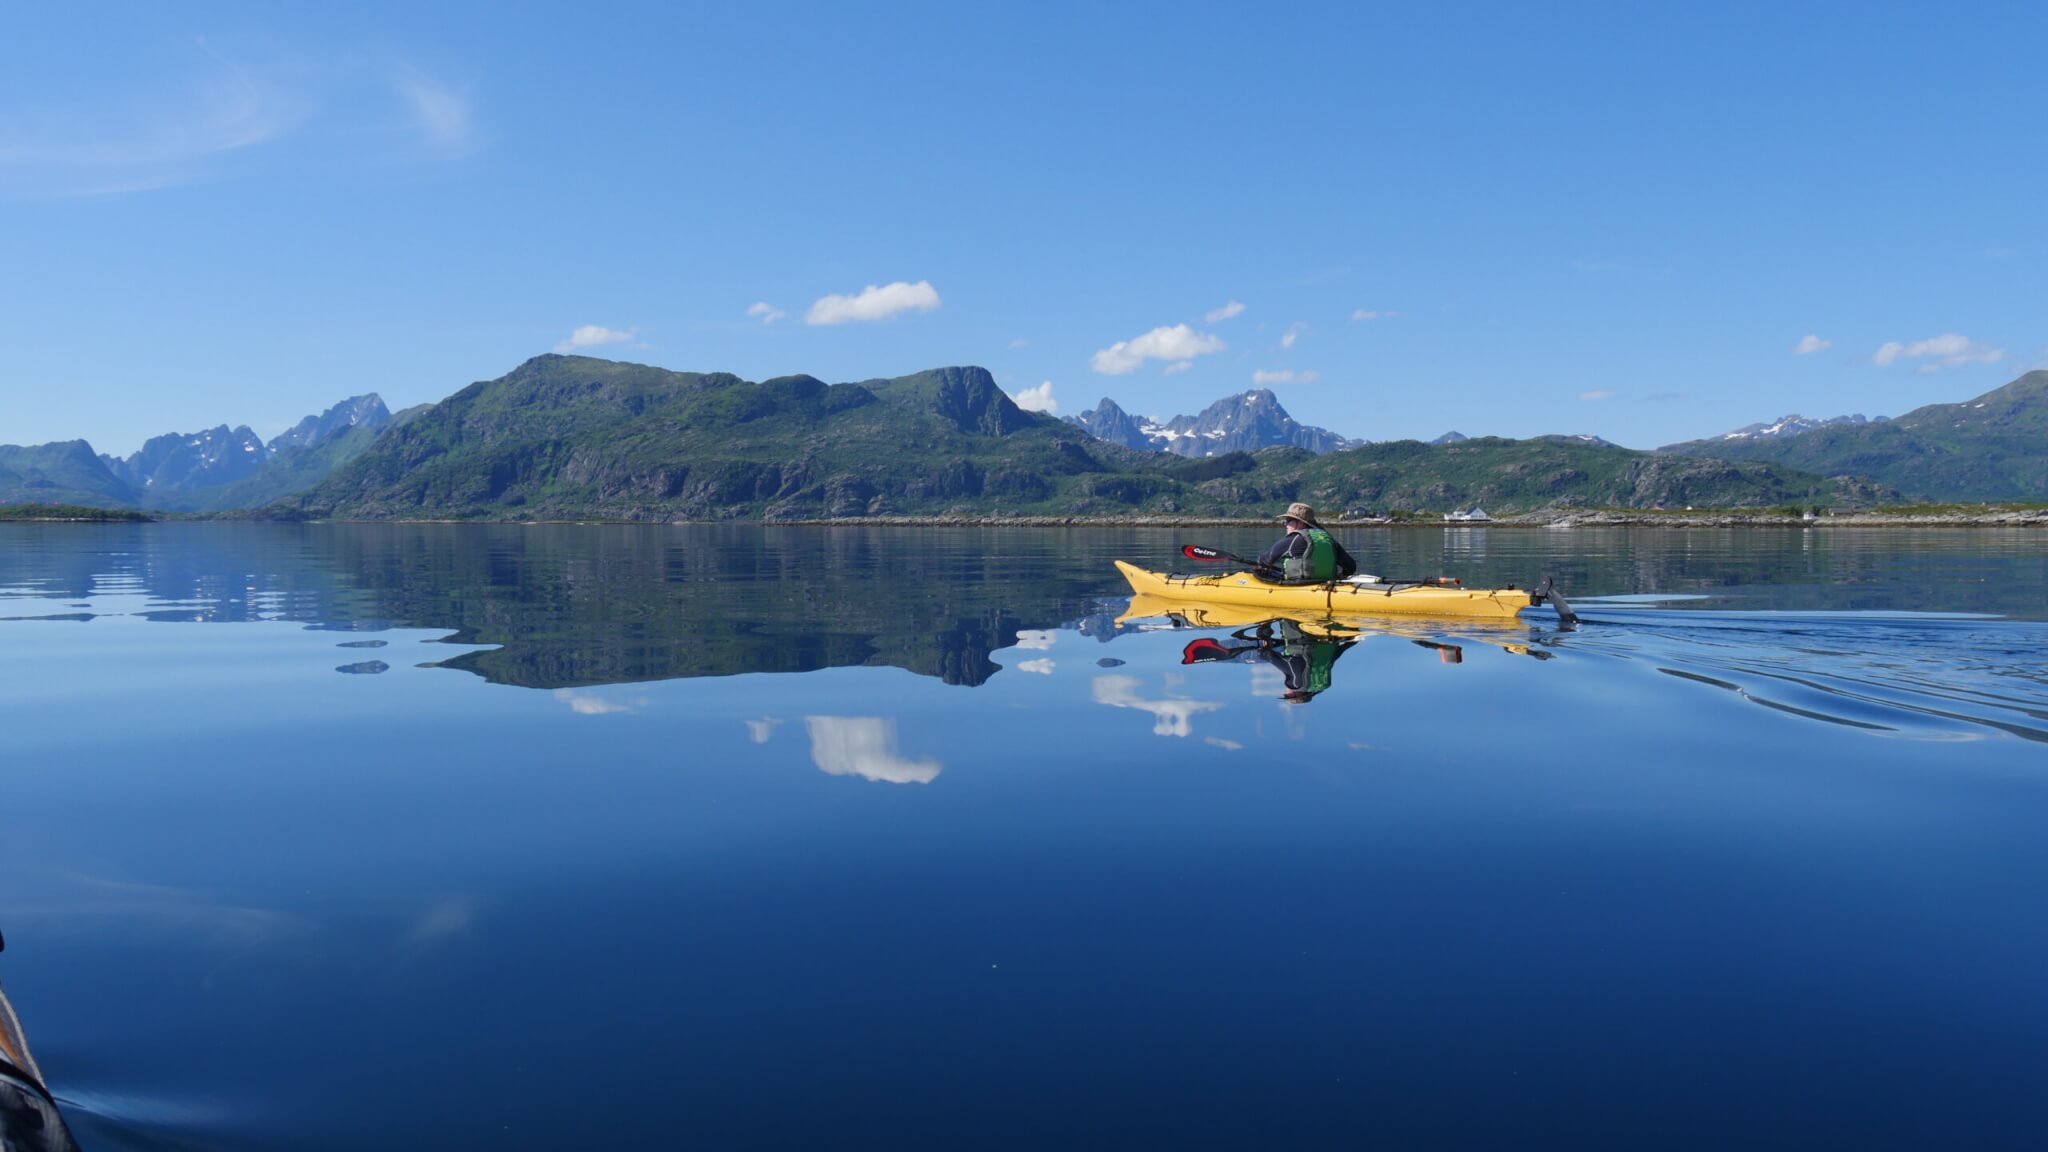
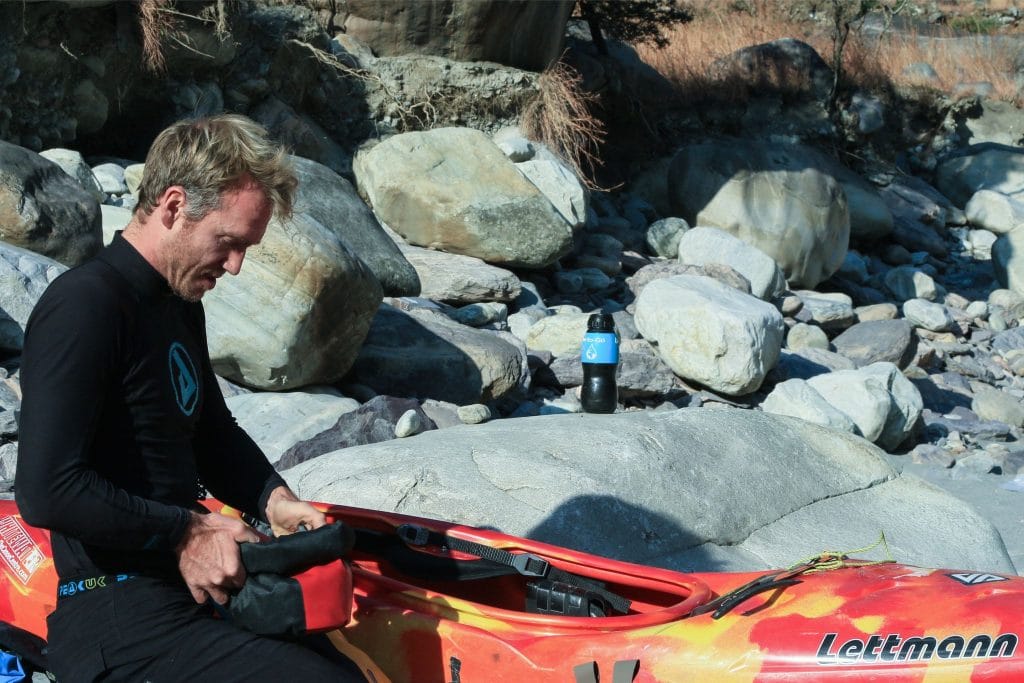
Following a month away in Northern Norway, guiding three successful 10-day sea kayak expeditions on the Lofoten Archipelago, I have spent time reflecting on the journey the participants went through. A year ago, we all embarked on a journey to go from paddlers to expedition paddlers. This involved many an evening spent online perusing maps and charts, discussing menus, lectures on Leave no Trace, devising our expedition philosophy, and most of all getting to know the people we would be sharing the highs and lows of expedition life with. During this time, we had three days together to consolidate our training and an opportunity to get out on a mini expedition overnight together to stress test our systems and processes. Most of all it gave us a chance to get used to living out of a 30cm diameter hatch in a sea kayak.

As a full-time expeditioner, coach and guide I have learnt the hard way and developed methods that mean I can be comfortable and able to thrive in the wilderness. Learning from mistakes, developing concepts and ideas into plans, and most off all organically growing my knowledge and skills. It is well known in coaching that independently learnt skills developed with mentoring and real-world testing are incredibly powerful.
With this in mind, I want you the reader to hear from the participants themselves. The team were mostly first-time sea kayak expeditioners, inspired to develop their skills as expedition paddlers and seek new adventures.

Post expedition I asked everyone the following question "what have you learnt that would be useful for someone in your shoes to know before their first sea kayak expedition? Not something I have coached you but something experience has taught you”. Here are the response in no particular order:
- Labelling my dry bags was helpful as I didn’t need to search for things and could pack up and organise things logically in terms of when I would use things.
- Boil extra water in the mornings to make a travel mug of tea/coffee for the day and also enough water for a flask of food e.g. soup/quick cook pasta.
- BA round my hand luggage rucksack to free up baggage space.
- Putting my water bladder on my deck so that was handy and a reminder to drink! It was too heavy to go in my BA but it was good to have the extra water on the hot day.
- I guess being patient and expect the unexpected especially with the weather, be prepared to be flexible with the route.
- Have a dry bag for "extras" in the morning - when packing, if you realise you forgot something that should go in a dry bag that's already closed, instead of opening it again and losing some time, it goes into the "extra" dry bag, which is the last one you close for the day.
- Making communal meals - it's nice to spend time with others, and it saves on gas, organisation and cooking time
- Communal coffee in a big pot.
- Making extra space by having the tent in a good dry bag behind the foot pegs
- When we got the chance to by stuff, adding fresh fruit like berries to drinking water, kept the berries fresh, made the water taste nice and the berries were a great addition to breakfast (generally rehydrated porridge type meals)

- I went with rehydrated meals for both breakfast and lunch. I tried quite a few before the trip to make sure I would like them. I was surprised how good they were.
- Wish I’d had one of the sun cream sticks rather than bottles of liquid much better for on the water.
- Having a well organised group nurse who had all the medication we forgot/ran out of. Thank you Louise.
- Being open to "expedition time", we didn't have day and night times or regular meal times. So there is a slight feeling of disorientation. Once I'd got my head around this everything is an opportunity!
- Paddle when the weather and tides are good. Eat when you’re hungry and sleep when you’re tired. Sort of takes you out of the 9 to 5 mindset. Invests you with flexibility.
- For fuel economy, only heat water to temp required for hot drink, doesn't need to boil.
- Fill Nalgene with hot squash, insulate with sock, it's a hot water bottle! Drink all of warm squash in the morning.
- Snack in BA, eat just it before landing at camp to give you some energy to set up.
- Using a tent peg as a hook to grab on to the stuff stuck at the end on the boat.
- Keep everything you are likely to need for a day’s paddling in the same accessible hatch, excluding snacks or hydration which should be in easy reach.

- Don't get sand in Dave's boat !
- Always pack a warm jacket (for stops), food & a stove (for lunch stops) and your tent, poles & pegs where they are easily accessible in your boat.
- M&S chai tea lattes were perfect, just add hot water . Delicious and easy.
- Don't rely exclusively on dried food: although nutritious it becomes tasteless and boring very quickly. Supplement it with fresh veg.
- Hand warmers to put in sleeping bag, warm sleeping clothes and a warm waterproof storm cag.
- Simplify as much as possible.
- Remember to pack loads of BA snacks and replenish every day!
- Ladies take 2 bras for paddling, if you are lucky enough to paddle cagless they will get encrusted with salt
- A pair of waterproof socks are great at camp for keeping feet dry and do look cool with sandals.
- Rotating say 3 simple meals during a trip works well and reduces waste.

- Google translate is your friend when shopping in foreign supermarkets – just because it looks like a tin of tuna doesn’t mean that it is!
- Packing the boat so your kit is accessible when you need it is extremely important to avoid repeated packing and repacking during the day.
- The choice of next-to-skin clothing is really important when wearing dry suits and cags etc when the opportunity to wash kit is limited. Natural fibres such as merino wool or bamboo work much better than manmade fibres.
- You will rarely camp on flat mown grass so your sleeping system will have to cope with rough and uneven ground.
- Being super organised with your food and kit means you don’t need to get up 3 hours before you are due to leave in the morning.
- Go with great people - everything else is just detail!
These are the weird and wacky top tips and handy hints that can only come from undertaking a real expedition and experiencing the highs, lows, challenges and celebrations from living out of a 30cm hatch in a sea kayak.
We had a bit of everything thrown at us. Days where it was too hot to paddle to a night spent holding tents down so they didn’t fly and everything in between. We didn’t just survive it, we thrived in our small expedition community, supported each other and learnt a hell of a lot about ourselves, each other, paddling and expedition life.

My philosophy for guiding, particularly international trips is simple. I am there to oversee safety and the long-term strategy of the expedition. I strive to prepare and train all the skills needed beyond paddling. Sharing expedition skills and experience I have honed over 16 years and thousands of nights camping in bizarre and wonderful places. In essence I like to coach expeditions rather than guide them. I have the best job in the world because I have the privilege to see all the toil and effort pay dividends when individuals become a team and an expedition becomes a holiday.
The expeditions were part of the new Plas y Brenin EMBARK initiative.
Expeditioners and Contributors: Deborah Reekie, Gemma Holloway,Alice Smith, Alice Lieutier, Louise Goodman, Lucy Bryant, Chris Smart, Katy Winterborn, Fraser Winterborn, Marion Baker, Pete Ogan, Phil Pascoe, Rachel Chamberlain, Alex Menniss, Christine Walker, Danie Bax, John Attree, Lucyjane Padgett, Kevin Walker, Hannah Rice, Patrick Cawley
Special mention should also go to fellow guides and coaches Lou Beetlestone, Annabel Finch and Oliver Sandeman

Want to up your paddling expedition skills even more? Check out our expedition symposium this autumn!

10 Tips for Staying Warm on the Water
Being cold sucks! There’s nothing more miserable than the sting of the cold hitting your hands making your fingers throb or being so unbearably cold that you just can’t focus. Here are 10 top tips for staying warm on the water, from our Senior Paddlesport Instructor, Chris Evans:
I’ve been on the sea in perfect flat calm northerly winter conditions, bringing little to no wind and breathtaking views. I could take this all in because I was warm enough. I’ve also had days on the water that were memorable for the wrong reasons, I didn’t want to be paddling because I was painfully cold due to incorrect layering, fuel or neglecting extremities.
Here are a few suggestions to avoid the sting of the cold and enjoy paddling in all seasons.
1 Get your layering right!
Do you naturally run hot or cold? More layers if you run cold, fewer if you run hot.
2 Don’t forget your feet!
It’s our natural connection point to the earth underneath us, so make sure there’s adequate insulation from the ground temperature as well as enough ankle and foot support for the environment.
3 How much are you doing during your paddling session?
A sprint-around, training session will need fewer layers than a social float. I find I need more layers when coaching than I do when personal paddling for example, as I spend more time sitting around.

4 Fuel up properly
On the coldest of cold days, think about hot food and drink rather than the buoyancy aid Mars Bars (other confectionery is available) that may have frozen. I’ve heard horror stories of dental work needing doing after a frozen BA chocolate bar! This could either be for when you’re off the water (only out for a short period of time) or in flasks with you.
5 Stop in sheltered spots
An obvious one (however I do still see it), is it’s colder in the wind than it is out. Finding that sheltered spot to have your above-warm lunch is always a winner (under a canoe works quite well).
6 Keep the blood flowing to the extremities
We’ve all felt the loss of dexterity in digits due to the cold and have all then tried to do a simple task like opening a zip. That stinging sensation can be avoided with simple movements of the extremities to minimise the loss of blood flow. ‘Shaking out the cold’ or ‘playing the piano’ works quite well.
7 One way of keeping the dexterity in your fingers is to use gloves or pogies
My preference here is pogies, as you can keep a natural connection and feel to your paddle with the pogie creating its own ecosystem. I do find them clumsy on the river, so I slide them into the middle of the paddle when it gets technical and put them on when the river chills out.
8 A helmet with holes in is much colder than one without, if yours is one with vents then think about a neoprene skull cap
Woolie hats when a helmet isn’t needed are a must on cold days and they drown out the mocking calls of the stubborn who believe that they don’t need pogies….
9 Get changed in the warm and dry
Putting on at least your thermals at home means you’re minimising the time spent changing in car parks, arguably the hardest part of paddling in cold conditions.
10 Carry spare layers if you’re out for the day
Consider a go layer and a stop layer. Go layer is one to add if you’re still moving and the stop layer needs to be substantial enough to keep you warm if you have to stop for an extended period of time. Boat fixing for example.
We hope you found Chris' tips useful. For more advice and the latest paddle news, make sure to sign up to our paddle newsletter and follow our paddlesports Instagram! You can also learn all about our courses here, from introductory courses all the way through to NGB.
Special thanks to our incredible sponsors, Peak PS, who help keep our instructors warm on the water.

Mountain Leader: What is a Quality Mountain Day?
Quality Mountain Days (QMD) and how to log them on your Digital Logbook (DLog) can be a very confusing element of the Mountain Leader Scheme (ML), so let’s clear up what counts and what doesn’t as a QMD.
Experience
Ultimately the ML is an experience-based award which includes training and assessment. It is awarded by Mountain Training – a collection of awarding bodies for skills courses and qualifications in walking, climbing and mountaineering in the UK and Ireland.
As an aspiring Mountain Leader you are on a journey to build your experience with a large variety of mountain walks combined with quality reflection after your hikes. Before training you need to achieve a minimum of 20 QMDs – and before assessment a minimum of 40 in total. The aim of the QMD system is to give the Mountain Leader an understanding of their personal experience level and guidelines on how to best develop.
As Mountain Training say, “Such days [QMD’s] make a positive contribution towards a person’s development and maturity as an all-round mountaineer.”
Definition of a QMD
To develop as a mountaineer, Mountain Training highlights eight points of which some or all are fulfilled to count as a QMD:
- the individual takes part in the planning and leadership
- navigation skills are required away from marked paths
- experience must be in terrain and weather comparable to that found in UK and Irish hills
- knowledge is increased and skills practiced
- attention is paid to safety
- five hours or more journey time
- adverse conditions may be encountered
- ascent of a substantial peak would normally be included in the day
This list promotes ‘the exploration of new areas’ and encourages Mountain Leaders to seek out ‘physical and mental challenge’ through ‘conditions experienced’ and ‘the terrain covered’.
Mountainous areas
Your QMDs need to be within ‘mountainous country’ in a minimum of three different areas. ‘For the purpose of the Mountain Leader scheme, ‘mountainous country' 'may be defined as wild country which may contain unavoidable steep and rocky ground where walkers are dependent upon themselves for immediate help’. Under this definition, Snowdonia counts but the Yorkshire Dales do not while most of the Scottish Highlands count but Dartmoor does not and the Lake District counts but not the Peak District.
However, walks in ‘non-mountainous country’ are very valuable. Whilst not directly ticking off the QMDs, these walks broaden a Mountain Leaders experience and should be logged as other categories such as Quality Hill and Moorland days or Mountain Walk as appropriate. A full list of Mountainous areas can be found at the bottom of this blog.
Camping
There is also a requirement before assessment to do 8 nights camping including at last 4 wild camps. ‘Wild camping takes place in moorland or mountain terrain remote from roads and habitation’. This is a great way to link 2 or 3 QMDs together in more remote areas and gain invaluable experience. Be sure to read up on environmental considerations before heading off on your first wild camp.
Close to the summit
The pursuit of QMDs can be seen as a fantastic opportunity to explore the mountainous areas of the UK. Is there an inspiring mountain you have always wanted to summit? Gather some information from guidebooks and online, clear a table, lay your map out and let your imagination take you on an adventure. From the top of that mountain, you may see your next inspiring objective. When you come down, you can reflect on your time in the mountains, gather your learning points and log it all on DLog. You can learn more about how to log your QMDs in the next blog. Happy Walking!
The quoted parts of this blog are from the Mountain Leader FAQ’s on Mountain Training’s website. If you want more information this is a fantastic resource.
In the United Kingdom and Ireland mountainous country includes:
- Snowdonia
- Brecon Beacons
- Lake District
- Mountains of Mourne
- Scottish Highlands
- Galloway Hills
- Cork & Kerry Mountains
- Galway & Mayo Mountains
- Donegal Mountains
- Dublin & Wicklow Mountains
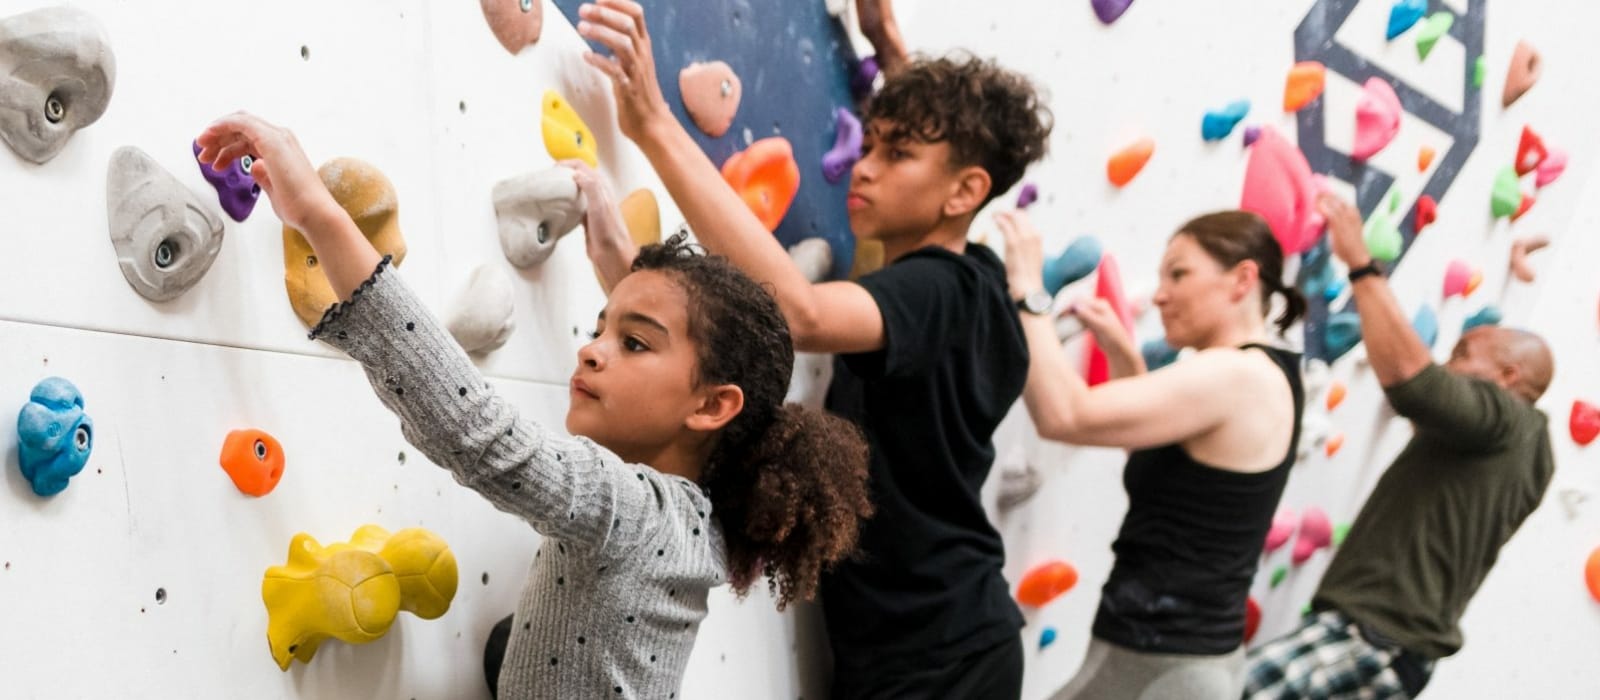
Working Together to Make the Outdoors More Inclusive
A recent survey of 4,000 adolescent girls and boys suggests girls are more likely to disengage from sport and exercise in their teens compared to boys. The survey of 11-18 year olds conducted by Women in Sport identified a number of barriers contributing to the drop off, including a lack of confidence, fewer perceived opportunities, periods, body image and feeling unsafe outdoors.
The study alludes to a huge missed opportunity to encourage more girls to stay active after Primary School, especially with girls that say they used to be sporty but have become gradually disengaged.
Since the beginning of the Covid-19 pandemic we have seen an increase in the number of people taking up outdoor activities and spending more time outdoors, yet more needs to be done to empower girls to overcome avoidable barriers that prevent them continuing with sports and exercise.
As Sport England's National Outdoor Centre, we are aware of the role we have to play in making the outdoors more inclusive, accessible and diverse.
To this end, we recently joined forces with seven other leading outdoor institutions to commission comprehensive research to understand current levels of participation in outdoor activities. The insights informed a plan of action - starting with the group agreeing to a number of commitments designed to improve diversity within the sector, including:
- Educating ourselves and our workforce – to gain greater insight from the lived experiences of those who are underrepresented
- Improving the diversity of people – within all levels of our organisations and in the imagery used to promote walking, climbing and camping
- Developing collaborative relationships – with community groups and individuals who can help us effect change and improve pathways for people to access walking, climbing and camping
- Holding ourselves accountable – for our actions and setting targets to improve equity, diversity and inclusion
There is a long way to go - as identified in the Women in Sport report - but for our part, we have already started investing more time and resources welcoming diverse groups. We are running a pilot training scheme with the Muslim Scout Fellowship (MSF), which, if successful, will be rolled out on a wider scale. In partnership with Experience Community, we will be delivering residential weekends that will support people with disabilities to get outdoors and participate in activities which allow them to get to places they may have never been able to access before, following a successful first weekend last year. This coming weekend. we’re also hosting #ShePaddles - a specialist canoeing and kayaking event to encourage more women to try paddlesports in partnership with Canoe Wales. While we’re making progress, it’s clear there is a lot more to do - both collectively and as individual organisations. From hiring staff from different backgrounds to creating initiatives and offerings that will help make outdoor learning more welcoming and accessible, so that more people can experience the often life-changing benefits associated with outdoor learning.
* This post first appeared in Horizons Magazine.
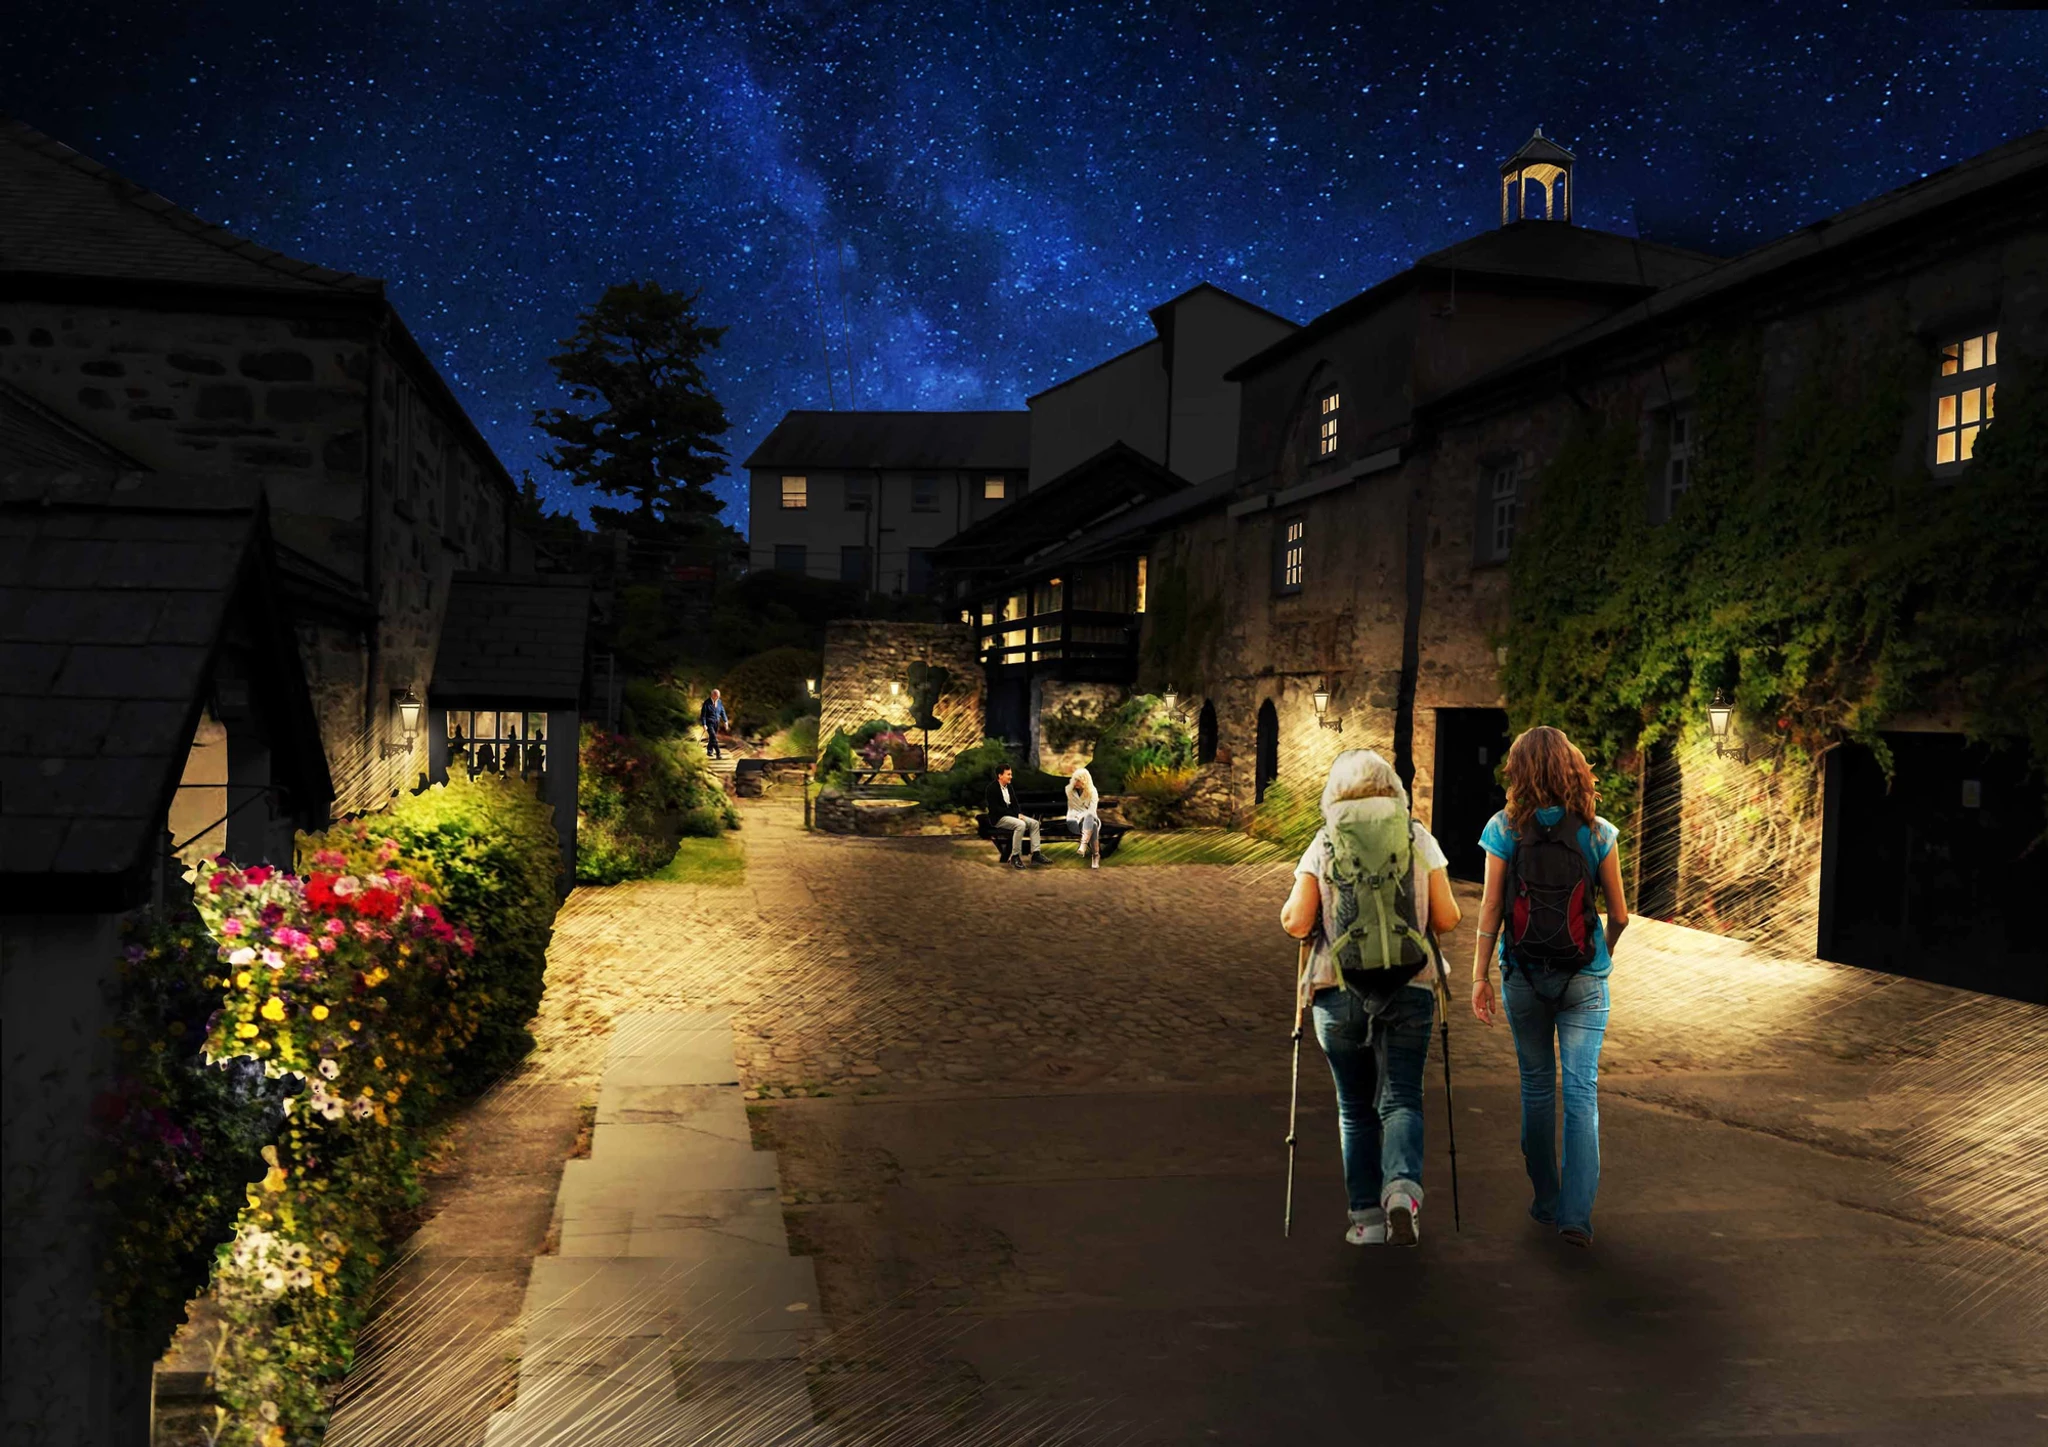
Plas y Brenin Joins Dark Skies to Combat Light Pollution
The eagle-eyed among you may have spotted Plas y Brenin featured on BBC’s Countryfile earlier this month promoting the completion of our Dark Skies renovation.
Watch the feature here on iPlayer by skipping to 48 minutes 35 seconds: https://www.bbc.co.uk/iplayer/episode/m0014jgc/countryfile-snowdonia
The project, a collaboration between PyB, Snowdonia National Park Authority (SNPA), Prosiect Nos and Dark Source (Lighting Design) involved the installation of a new environmentally friendly lighting scheme, designed to halve our energy consumption whilst minimising light pollution and impact on biodiversity.
Lighting accounts for almost 6% of the global CO2 emissions and 20% of the electricity used worldwide. Besides obscuring the view of the night sky, inefficient lighting wastes more than £1bn a year in the UK alone. The switch is expected to generate an annual power saving of 6,000kW and an annual carbon reduction of 1.5 Tonnes of CO2e.
Light pollution also has drastic effects on the environment and well-being of all humans, animals and plants. It alters our perception of the night and blocks our access to our oldest heritage, the stars.
Now complete, the aim of the project uses the latest LED technology to create warm-coloured, glare-free lighting in order to meet dark-sky friendly measures, reduce energy waste and impact on biodiversity whilst enhancing the night-time experience. Many of the new lights can be found underneath handrails, facing downwards so the view of the sky is unaffected.
Over time, we hope it means we’ll see more flora and fauna around the centre - as well as avid star gazers!

Building Winter Skills: Navigation
Hiking at this time of year can be immensely rewarding and the scenery stunning. However, given seasonal weather conditions and terrain, navigation requires a little more care, planning and preparation.
Firstly, spend some time planning your route – ideally using a map. Try to visualise the ground, to give yourself an idea of what to expect and what you will see. Identify key points along the way, and plan your route to take into account any avalanche hazard that might be present and avoid high-risk slopes.
When packing, make sure your map and compass are readily available at all times, ideally in an easy to access pocket. Have the compass available to be held on the map with one hand so the two items are used as one. The last thing you want to be doing in extreme weather conditions is delving to the depths of your bag searching for them.
Swat up on your map reading skills, make sure you can measure distance and learn to gauge scale. On OS and Harvey maps, across one map square is 1km (1.4km diagonally). If you walk at 4km per hour it will take 15 minutes to cross a square. Add 30 seconds to a minute for every 10 metres, depending on how close the contours are together (which signals how steep the terrain is). Treat downhill as being on the flat.
Keep an eye on your pace. 100m is 2mm on a 1:50,000 scale map and 4mm on a 1:25,000. Time how long it takes to pace 100m, and multiply by 10 to work out your speed. 1min 30sec is 4kph; 2min is 3kph. Then monitor factors that slow your pace (e.g. weather conditions) and recalculate your ETA and if required, make the decision to cut short your hike.
As you set off, set your map by placing the compass on or next to the map and turn the map until the red end of the compass needle points to the top of the map. Keep the map set and move your body around the map until you are facing the direction of your planned route. Continue to keep the map set as you walk.
Learn to take your bearings. Place the edge of the compass on the map from A to B along the proposed line of travel. Ensure the base plate with the direction-of travel arrow points straight ahead and align your body behind it. Grip the compass on the map and turn your whole body slowly round until the red end of the needle points to the top of the map. The base plate will indicate your direction of travel; in reality this is just a slightly more accurate version of map setting and, provided the compass remains on the map with the red end of the needle pointing to the top, it will enable you to aim on objects ahead so you can walk in a straight line. You don’t need to turn and have the needle point to the north on the dial unless you want to communicate a bearing to someone else or lift the compass off the map. This will seem strange as we’re usually taught to turn the dial and use the compass off the map, but this is how orienteers navigate quickly and efficiently.
Most importantly, know what to do if you get lost. First of all, stay calm, set your map and make a plan. If you are on or near a linear feature such as a path or stream, look to see if it aligns with one on the map. Follow the feature – it will usually change direction or create a junction with another linear feature that should be identifiable on the map. If you are on a hillside, it will face a certain direction (aspect); so just use the compass needle to help you work out which direction the slope faces looking out. It won’t tell you how high up the slope you are; but if you are on a slope facing north, for instance, you can eliminate all slopes on the map that are facing east, south and west.
Make the most of winter hiking, but most importantly stay safe, check the weather forecast and be prepared – that way you’ll get the most out of your experience and it’ll hopefully lead to many more.